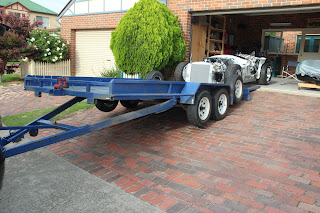
It has been 16 months since the Cobra arrived at my garage and has been resting on 50cm high trestles ever since.
Anyway the time has come to put the wheels on and lower it to the floor for the trip to the auto electrician. I was quite stunned at how low the car is after being so used to it sitting at a good working height on the trestles.
My drive way is quite short and steep and the problem with long car trailers in this situation is the tail of the trailer sits quite high and the ramps are very steep that you loose the clearance and sprag the front panels. A good friend of mine has this really cool tilt trailer that made loading dead easy. Once the car started up the ramps, the trailer leveled out and their was very little load on the winch to the point we had to put a block in front of the wheel in case it rolled forward.
And here we are sitting at the Auto Elecs.
We are moving ahead with the wiring and I will some more pics in a few weeks.
Cheers
Russell
Friday, 26 February 2016
Wednesday, 24 February 2016
Electrical Inspiration...NOT!
Ok, we are in new territory now but before we get into that I had a rethink with the fuel vapor lines and decided to reroute them to avoid fuel flowing into the vapor lines.
As Pace have incorporated the tail light, indicator, stop light and reversing light into the one unit, several modifications needed to be done to appease ADR,s. Pace have provided white opaque white tail light lenses using LED lights with the various colours to meet the requirements, ie, tail light = red, indicator = amber, reversing light = white and stop light = double red. This is a very good arrangement but require some modification to the existing tail light arrangement. I have posted some pics which I hope explains the changes.


 .
.
I changed the lenses from the standard red to white/clear and modified the globe carrier to take the new fittings.

As Pace have incorporated the tail light, indicator, stop light and reversing light into the one unit, several modifications needed to be done to appease ADR,s. Pace have provided white opaque white tail light lenses using LED lights with the various colours to meet the requirements, ie, tail light = red, indicator = amber, reversing light = white and stop light = double red. This is a very good arrangement but require some modification to the existing tail light arrangement. I have posted some pics which I hope explains the changes.


 .
.I changed the lenses from the standard red to white/clear and modified the globe carrier to take the new fittings.


Pace provide a moulded carrier for the globe holders that incorporate stainless steel locking plates that the globe holders clip into. It is only a matter of cutting the right size hole in the carrier and relieving the thickness of the back face then the locking plates can be fitted. I had to relieve the locking plates so they would sit flat to allow the globe holders to fit. To accurately align the holes in the moulded carrier, I fitted the locking plates in the right position then sat a same size hole saw into the opening in the locking plate then place a neat fitting drill into the threaded section of the hole saw and twisted the drill leaving a centre point to run the proper hole saw guide drill and hole saw through. This resulted in a very accurate match up of the globe holder and bracket. It was then a matter of fitting the globe holders to the carrier. This require a bit of pressure because of the rubber seal but by putting the globe holder in the vice to stop it from turning then placing a finger under the holder and applying pressure to the carrier while turning it, it clipped together beautifully with a nice firm seal.
The next act in the play was to fit the little Ferrari style side markers. This is quite easy and just a matter of trimming the globe carriers down enough to slip tightly into the rubber boot and the assembly is done. When I ordered my Cobra, I ordered it with all the cut outs already done which will save real dramas latter. For things like screw holes and smaller hole, Pace puts a small dimple in the body so all you need to do is get the right drill or hole saw and drill through this dimple and you are in the right spot. Once I had drilled the hole for the side markers, they slipped in quite tightly so on final assembly I will just put a small bead of silicone around the join to seal it and add a bit more of a hold on it.
The headlights and front indicators where very straight forward and just drill through the marked spots and every thing fits.
<
For some reason the pic of the front of the car will not load.
Some time back I went through the assembly of the demister system, well this has now been fitted in it rightful place.
Subscribe to:
Comments (Atom)


