AOne thing about the Pace 427 body is it's "straight from the mould" condition. All the panels fit with the correct gaps so no real rework is required in this area and if you wanted to, you could run the gel coat as the final finish. In my previous post I showed pics of sanding out the seams which worked well.
The bonnet and doors needed some touch up on the glue lines between the inner and outer panels. Some filling and sanding was require to bring the joints to an acceptable finish.
I had a piece of body that had been cut out with the black gel coat on it so I took it to the local auto paint store and had the colour matched and might I say they got it spot on. I primed all the repairs including the side and vent areas and painted them in the matching black.
With the touch ups done, I started to polish the body and the more I got into it the more correction I had to do, no wonder painters charge a fortune, the hours required are staggering. This task still requires some work so I will post some pics when completed. It was about this time that I decided I will have the car painted professionally by Sime at Paintwerks in Moorabbin because the Cobra is just worth the extra TLC.
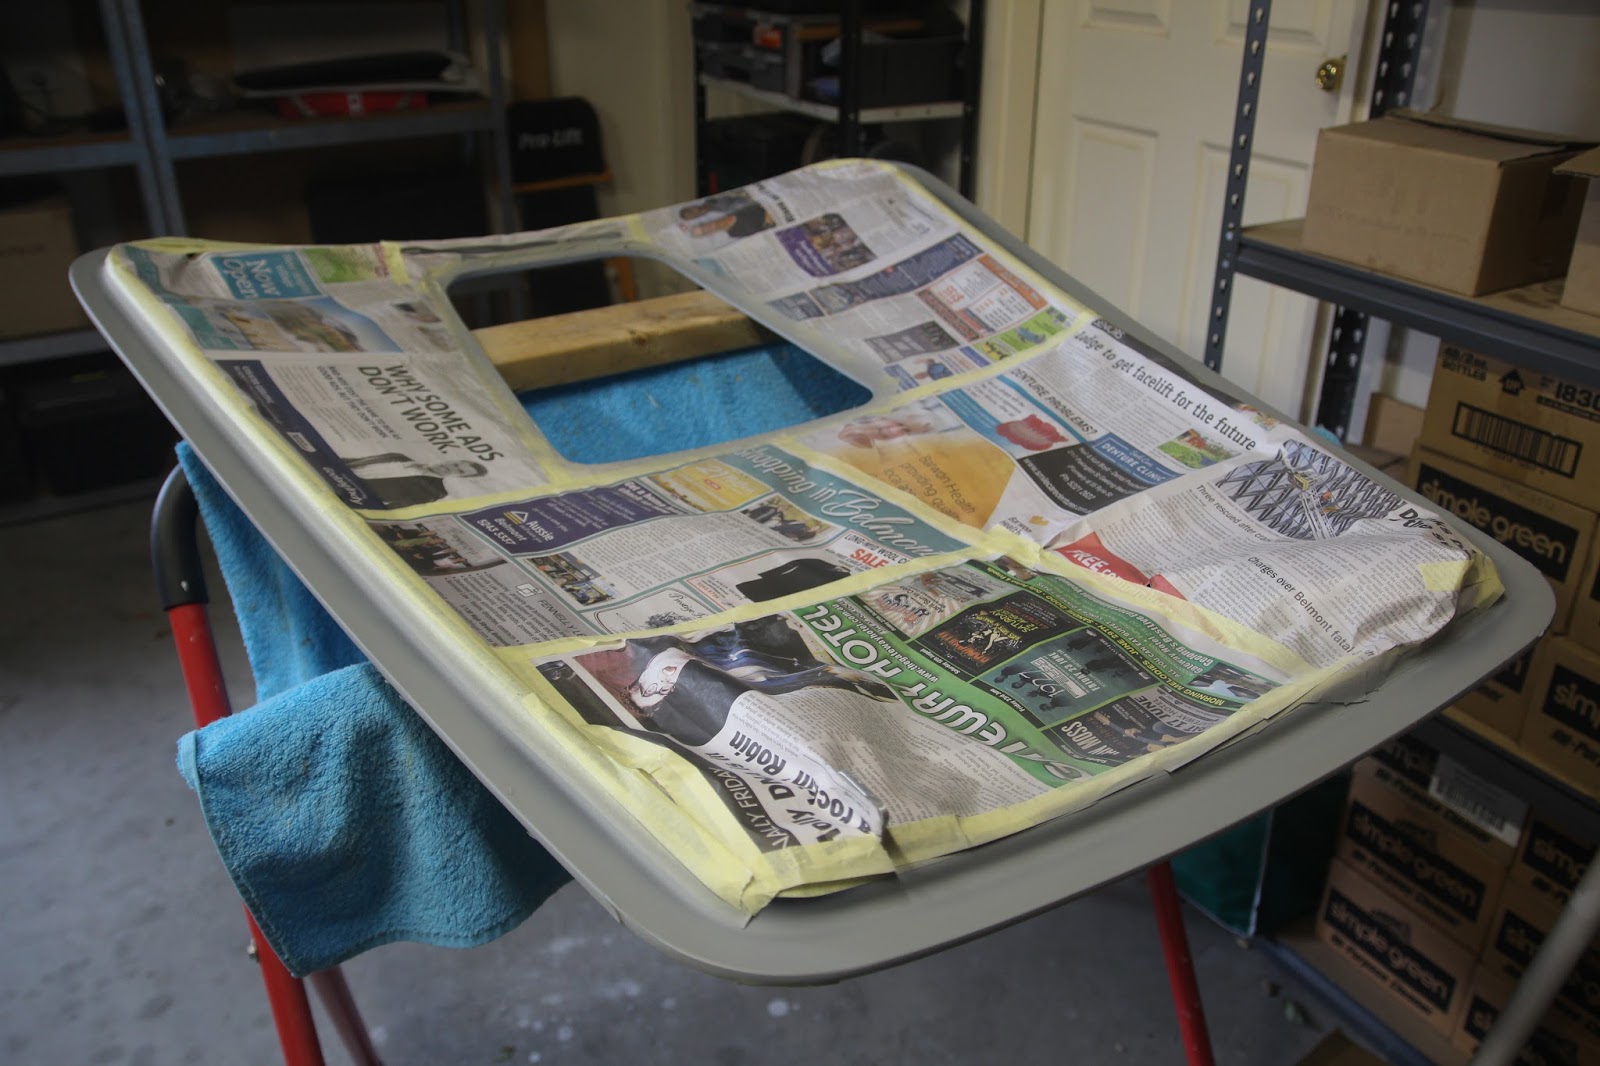
I have also installed the insulation under the bonnet and the scoop with a high heat resistant reflective fibre glass matting. Using the same Selleys 401 Industrial adhesive I used on the fire wall, I spread an ample layer of adhesive on the bonnet making sure that no thick patches were there as this can be seen in the matting. It takes a while to get it right and you have to work fast using a roller to push the adhesive around. I used a $2 Aldi pie edge decorator to push the matting into the edges of the bonnet, the edger has 2 decorative wheels and a blade type wheel that gave a nice sharp edge. Same with the scoop, I just forced the mat into the adhesive and trimmed the edges.
With the insulation in place, I finished off the edging with some rubber U channel which gave it a nice touch. The coffee cups were enough to hold the rubber in place while the adhesive dried.
That will do for tonight, I will have some more progress pick soon.
Cheers
Russell
Wednesday, 16 August 2017
Wednesday, 26 April 2017
A few More Step
Now that the engine is running and every thing seems to be ok in that department, I find I can no longer select any gears. Not sure what has changed as I could select all gears easily prior to the first start. I tried rotating the back wheels in case the output shaft was influencing the selectors then started the engine and tried again, nothing, it felt like the gear stick had been locked out. I tried pumping the clutch (not sure why) but that did nothing. I decided to take the top of the trans and rejig the selectors but everything was as it should be but I moved the selectors around with a screw driver put the gear stick back in and to my surprise we were in business again. I'm not sure what I did but it all went together ok and I can now get all gears. I started the engine and tried selecting gears but they just grated so an adjustment on the clutch push rod and I can now select all gears with the engine running.
As I said in my last post, the seats have arrived and they look stunning. The trimmer has finished them off beautifully with under leg supports which I need and a flap from the cushion that attaches to the under side of the aluminium bucket with press studs. Seat heaters have also been installed in the cushions.
The only problem with the seats is the height. They are about 35mm too high and my head is level with the top of the windscreen so after a little running around and settling in I will have some modifications made to them.
At this stage I intend to just run with the black gel coat as it is really quite acceptable as it is. I have started sanding out the seam lines and they can be removed effectively however there are a few areas that the fibre glass has shown through in the join which will have to be touched up. The bonnet and the doors require quite a bit of work where the adhesive for bonding the inner and outer shell shows through. After these area are all sanded and touched up, I can start the polishing process. I have purchased a good polisher so I expect to get good results.
Hopefully this weekend I can take the Cobra for a little drive up and down my court. That will be a thrill for my neighbours as they have all shown a great deal of interest in it, will be a thrill for me too.
See you next time.
Russell
As I said in my last post, the seats have arrived and they look stunning. The trimmer has finished them off beautifully with under leg supports which I need and a flap from the cushion that attaches to the under side of the aluminium bucket with press studs. Seat heaters have also been installed in the cushions.
The only problem with the seats is the height. They are about 35mm too high and my head is level with the top of the windscreen so after a little running around and settling in I will have some modifications made to them.
At this stage I intend to just run with the black gel coat as it is really quite acceptable as it is. I have started sanding out the seam lines and they can be removed effectively however there are a few areas that the fibre glass has shown through in the join which will have to be touched up. The bonnet and the doors require quite a bit of work where the adhesive for bonding the inner and outer shell shows through. After these area are all sanded and touched up, I can start the polishing process. I have purchased a good polisher so I expect to get good results.
Hopefully this weekend I can take the Cobra for a little drive up and down my court. That will be a thrill for my neighbours as they have all shown a great deal of interest in it, will be a thrill for me too.
See you next time.
Russell
Tuesday, 25 April 2017
Another Milestone Reached
While I was in the process of installing bits, I decided to fit the wipers seeing that the ferals and wiring were in. This is quite strait forward and only requires shortening the arms.To get the right length for the arm, fit the spring loaded clip to the feral and point them in the direction that they would be at rest (make sure the wipers are in the "home" position). Measure from the centre of the feral to the bottom of the upper windscreen frame and note the measurement. Take an arm and cut the curly end of it leaving 16mm from the dimple (see the pic below), this dimple is the locator for the wiper blade. Install the arm into the blade and crimp the tabs.Having already got the measurement to the bottom of the frame, lay the arm and blade assembly on the spring loaded clip and slide the arm over the clip until you have the same distance from the end of the blade to the centre of the clip making sure you have clearance so the blade doesn't hit the frame, mark where the arm needs to be cut.
With the wipers finished, It was time to fill the coolant and put the oil in the engine, gear box and diff. I have a special funnel for the coolant which allows you to get the coolant in fairly easily as it burps itself as it goes and doesn't create air locks and blow back. When I was satisfied with the coolant, I pressure tested the cooling system and tightened up all the leaks I could find and topped up the coolant level.
Putting the oil in the engine was not a simple pour in through the oil filler but had to be purged through the oil sender port. I borrowed a mates air powered purging system and filled it with two litres more oil than I needed so air pockets couldn't form. I also made sure to fill the oil filter first. The purging forces the oil through the oil pump, oil galleries in the crank and bearings, through the cam drives right up to the four overhead camshafts and all the way back through the filter ensuring that the oil pump is primed and everything is properly lubricated on the first start.thing
Things were ready for a test so I got 20 litres of fuel and put it in the tank and placed two fire extinguishers with in easy reach and turned the ignition on to start the fuel pump and check for fuel leaks. Well, that was the understatement, fuel started pouring over the floor so I instantly turned the pump off. I had a look underneath and the fuel was pouring out of the fuel regulator. The cause of this was the auxiliary plugs had not been sealed. I checked them for tightness when fitting the pump and they were very tight , I thought as they were factory fitted they would be sealed so that was a lesson learned. I sealed the plugs and allowing the sealant to dry for the required 24 hours then tried again, perfect, no leaks.You can see the plugs in the pic.
My Auto Elec dropped over to check the gauges so we decided to try a first start. This is always an anxious moment wondering what is going to happen. I turned on the ignition then hit the starter and the Ford Racing Coyote bellowed into life. The oil pressure immediately sprung to 80 PSI at 980 RPM idle speed, exactly where it should be. We watched the gauges for a while and apart from the fuel pressure being slightly low every thing was as it should be.
My seats are finally finished so next post I will include some pics of them and hopefully have had a drive up and down the court.
Cheers
Russell.
With the wipers finished, It was time to fill the coolant and put the oil in the engine, gear box and diff. I have a special funnel for the coolant which allows you to get the coolant in fairly easily as it burps itself as it goes and doesn't create air locks and blow back. When I was satisfied with the coolant, I pressure tested the cooling system and tightened up all the leaks I could find and topped up the coolant level.
Putting the oil in the engine was not a simple pour in through the oil filler but had to be purged through the oil sender port. I borrowed a mates air powered purging system and filled it with two litres more oil than I needed so air pockets couldn't form. I also made sure to fill the oil filter first. The purging forces the oil through the oil pump, oil galleries in the crank and bearings, through the cam drives right up to the four overhead camshafts and all the way back through the filter ensuring that the oil pump is primed and everything is properly lubricated on the first start.thing
Things were ready for a test so I got 20 litres of fuel and put it in the tank and placed two fire extinguishers with in easy reach and turned the ignition on to start the fuel pump and check for fuel leaks. Well, that was the understatement, fuel started pouring over the floor so I instantly turned the pump off. I had a look underneath and the fuel was pouring out of the fuel regulator. The cause of this was the auxiliary plugs had not been sealed. I checked them for tightness when fitting the pump and they were very tight , I thought as they were factory fitted they would be sealed so that was a lesson learned. I sealed the plugs and allowing the sealant to dry for the required 24 hours then tried again, perfect, no leaks.You can see the plugs in the pic.
My Auto Elec dropped over to check the gauges so we decided to try a first start. This is always an anxious moment wondering what is going to happen. I turned on the ignition then hit the starter and the Ford Racing Coyote bellowed into life. The oil pressure immediately sprung to 80 PSI at 980 RPM idle speed, exactly where it should be. We watched the gauges for a while and apart from the fuel pressure being slightly low every thing was as it should be.
My seats are finally finished so next post I will include some pics of them and hopefully have had a drive up and down the court.
Cheers
Russell.
Thursday, 30 March 2017
A Few More Bits And Pieces
It's been quite a while since I posted as not much has happened since. I had been waiting on my auto elec to become available due to several projects he had on so in the meantime I spent a bit of time on fitting the roll bar. There is a fair bit of mucking around to get it to fit as the clearances are very tight and well engineered.
Before I could fit the roll bar I had to do a straightening job on it or should I say a spreading job. The lower section of the bar had closed in by about 12mm and wouldn't line up with the pre-cut holes. I had to enlist the help of a patented roll bar spreading tool.
Once the roll bar was at the right dimensions and fitted through the holes in the body, I fitted the lower roll bar brackets and positioned them in the correct location.
I found that I had to relieve the holes in the body quite considerably to allow the brackets to locate and to also allow the rear support bar to obtain the correct angle so it would align with the bracket in the boot. The tricky part of this is the gap that the rear support bar goes through is less than 1mm so the geometry has to be pretty well lined up, Pace certainly had a think about this.
When I was confident that the roll bar was in the right location I aligned the shear plates and applied packers where required then drilled and bolted the roll bar brackets in position.
One of the things I paid a lot of attention to is to make sure that the roll bar is easily removable and the tightening of the bolts doesn't sprag everything up. This is not an important issue but to me it is just good engineering.
I purchased a 13 row oil cooler to mount in the mouth of the Cobra purely because I reckon it looks good. When I started to fit the cooler it became apparent that I needed a much taller cooler to fill the opening that is there for this purpose. The reason I went for a 13 row cooler is because that is what the Cobra fraternity recommended. After a bit of research I found a 16 row unit that fitted the dimensions perfectly

With this new oil cooler, I used a standard aluminium 50x25 U channel for the lower mounting bracket and a top mounting plate and it worked a treat.
With the oil cooler bolted into position, I reckon it looks pretty good.
The oil cooler is non functional as I don't think it will be required but if it is, it' easy to connect. Here is the finished item.
One of the problems that I did have was the steering backlash that was proving very difficult to diagnose. I first thought the rack was defective as you couldn't feel the movement in the steering shaft. After a lot of messing around and being aware that the steering universals only had one lock screw which fixed onto the round part of the column and not the flats was a very bad idea, I removed the universals and drilled and tapped for an additional set screw that clamped onto the flats of the steering column. Once I had reassembled the column and tightened every thing up, I was staggered by the difference this made to the free play in the steering. I could not feel any movement prior but once I had clamped onto the flats, it was obvious where the movement was. I am a very happy camper.
Another little trick to remove play in the steering column was a bearing devised by Dave Stean in W.A. that fits into the steering column shroud and removes all side play in the column and centralises it all. Bloody great idea.
Another neat feature from Pace is the steering lock shroud, just finishes it all off. There is a bit of cutting and jigging around but it fits perfectly.
The original hole that Pace had provided where impossible to bolt to as you could not access the nut to fasten it so my mate Darryl came up with the captive nut system which solved all the problems.
Ok, my auto elec has called and is now free so lets get the Cobra over for final wiring of all the extremities like head lights, tail lights etc.
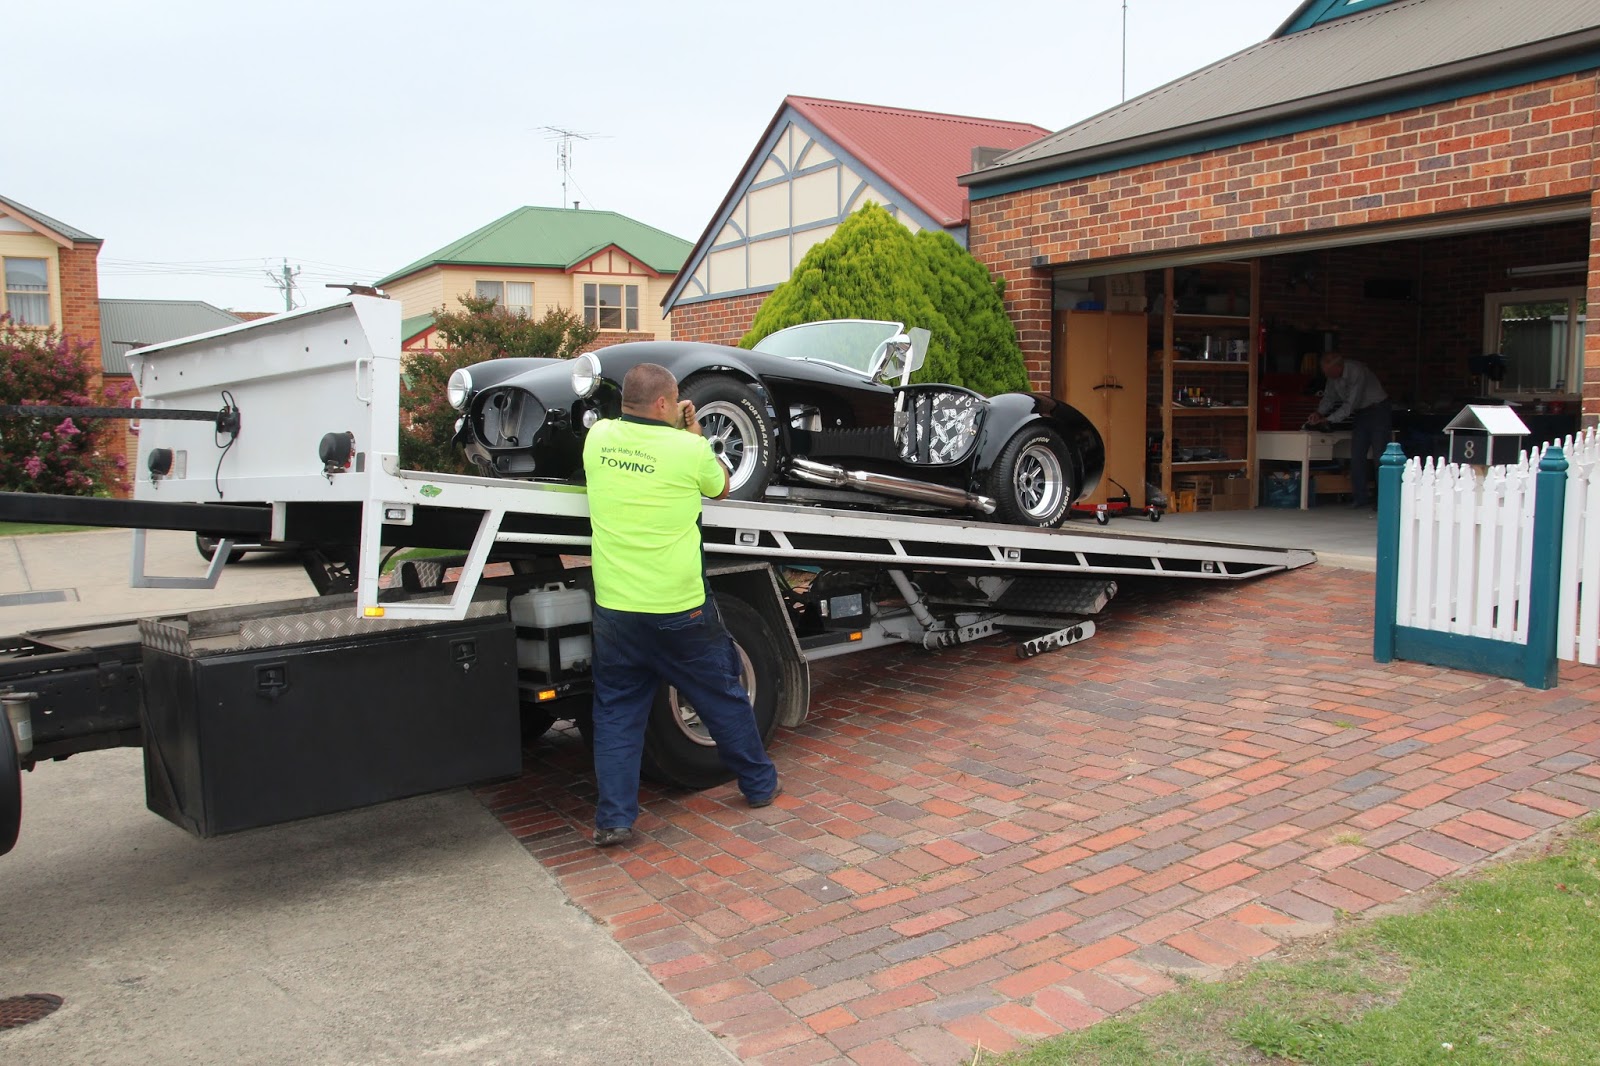
In an earlier post you will see a tilt tray trailer that I used to get my car to the elec but unfortunately that got stolen and I had to use a tilt tray truck which fitted the job after some very skillful driving in a small cul de sac.
In my next post, all things being equal, we should hear the patter of little Cobra feet or maybe the roar of a 5.0 Ford coyote. Damn, I can't wait. Hope I can put a 1st start video on this blog.
See you when the smoke clears,
Cheers Russell
Before I could fit the roll bar I had to do a straightening job on it or should I say a spreading job. The lower section of the bar had closed in by about 12mm and wouldn't line up with the pre-cut holes. I had to enlist the help of a patented roll bar spreading tool.
Once the roll bar was at the right dimensions and fitted through the holes in the body, I fitted the lower roll bar brackets and positioned them in the correct location.
I found that I had to relieve the holes in the body quite considerably to allow the brackets to locate and to also allow the rear support bar to obtain the correct angle so it would align with the bracket in the boot. The tricky part of this is the gap that the rear support bar goes through is less than 1mm so the geometry has to be pretty well lined up, Pace certainly had a think about this.
When I was confident that the roll bar was in the right location I aligned the shear plates and applied packers where required then drilled and bolted the roll bar brackets in position.
One of the things I paid a lot of attention to is to make sure that the roll bar is easily removable and the tightening of the bolts doesn't sprag everything up. This is not an important issue but to me it is just good engineering.
I purchased a 13 row oil cooler to mount in the mouth of the Cobra purely because I reckon it looks good. When I started to fit the cooler it became apparent that I needed a much taller cooler to fill the opening that is there for this purpose. The reason I went for a 13 row cooler is because that is what the Cobra fraternity recommended. After a bit of research I found a 16 row unit that fitted the dimensions perfectly
With this new oil cooler, I used a standard aluminium 50x25 U channel for the lower mounting bracket and a top mounting plate and it worked a treat.
With the oil cooler bolted into position, I reckon it looks pretty good.
The oil cooler is non functional as I don't think it will be required but if it is, it' easy to connect. Here is the finished item.
One of the problems that I did have was the steering backlash that was proving very difficult to diagnose. I first thought the rack was defective as you couldn't feel the movement in the steering shaft. After a lot of messing around and being aware that the steering universals only had one lock screw which fixed onto the round part of the column and not the flats was a very bad idea, I removed the universals and drilled and tapped for an additional set screw that clamped onto the flats of the steering column. Once I had reassembled the column and tightened every thing up, I was staggered by the difference this made to the free play in the steering. I could not feel any movement prior but once I had clamped onto the flats, it was obvious where the movement was. I am a very happy camper.
Another little trick to remove play in the steering column was a bearing devised by Dave Stean in W.A. that fits into the steering column shroud and removes all side play in the column and centralises it all. Bloody great idea.
Another neat feature from Pace is the steering lock shroud, just finishes it all off. There is a bit of cutting and jigging around but it fits perfectly.
The original hole that Pace had provided where impossible to bolt to as you could not access the nut to fasten it so my mate Darryl came up with the captive nut system which solved all the problems.
Ok, my auto elec has called and is now free so lets get the Cobra over for final wiring of all the extremities like head lights, tail lights etc.
In an earlier post you will see a tilt tray trailer that I used to get my car to the elec but unfortunately that got stolen and I had to use a tilt tray truck which fitted the job after some very skillful driving in a small cul de sac.
In my next post, all things being equal, we should hear the patter of little Cobra feet or maybe the roar of a 5.0 Ford coyote. Damn, I can't wait. Hope I can put a 1st start video on this blog.
See you when the smoke clears,
Cheers Russell
Subscribe to:
Posts (Atom)