Tuesday, 17 February 2015

2015 came around really quickly

Well, here we are already 6 weeks into 2015 and the time is just flying by.

I have been making some progress over the Christmas/New Year period. I had great plans and expected to be further advanced than what I am but advance we did.

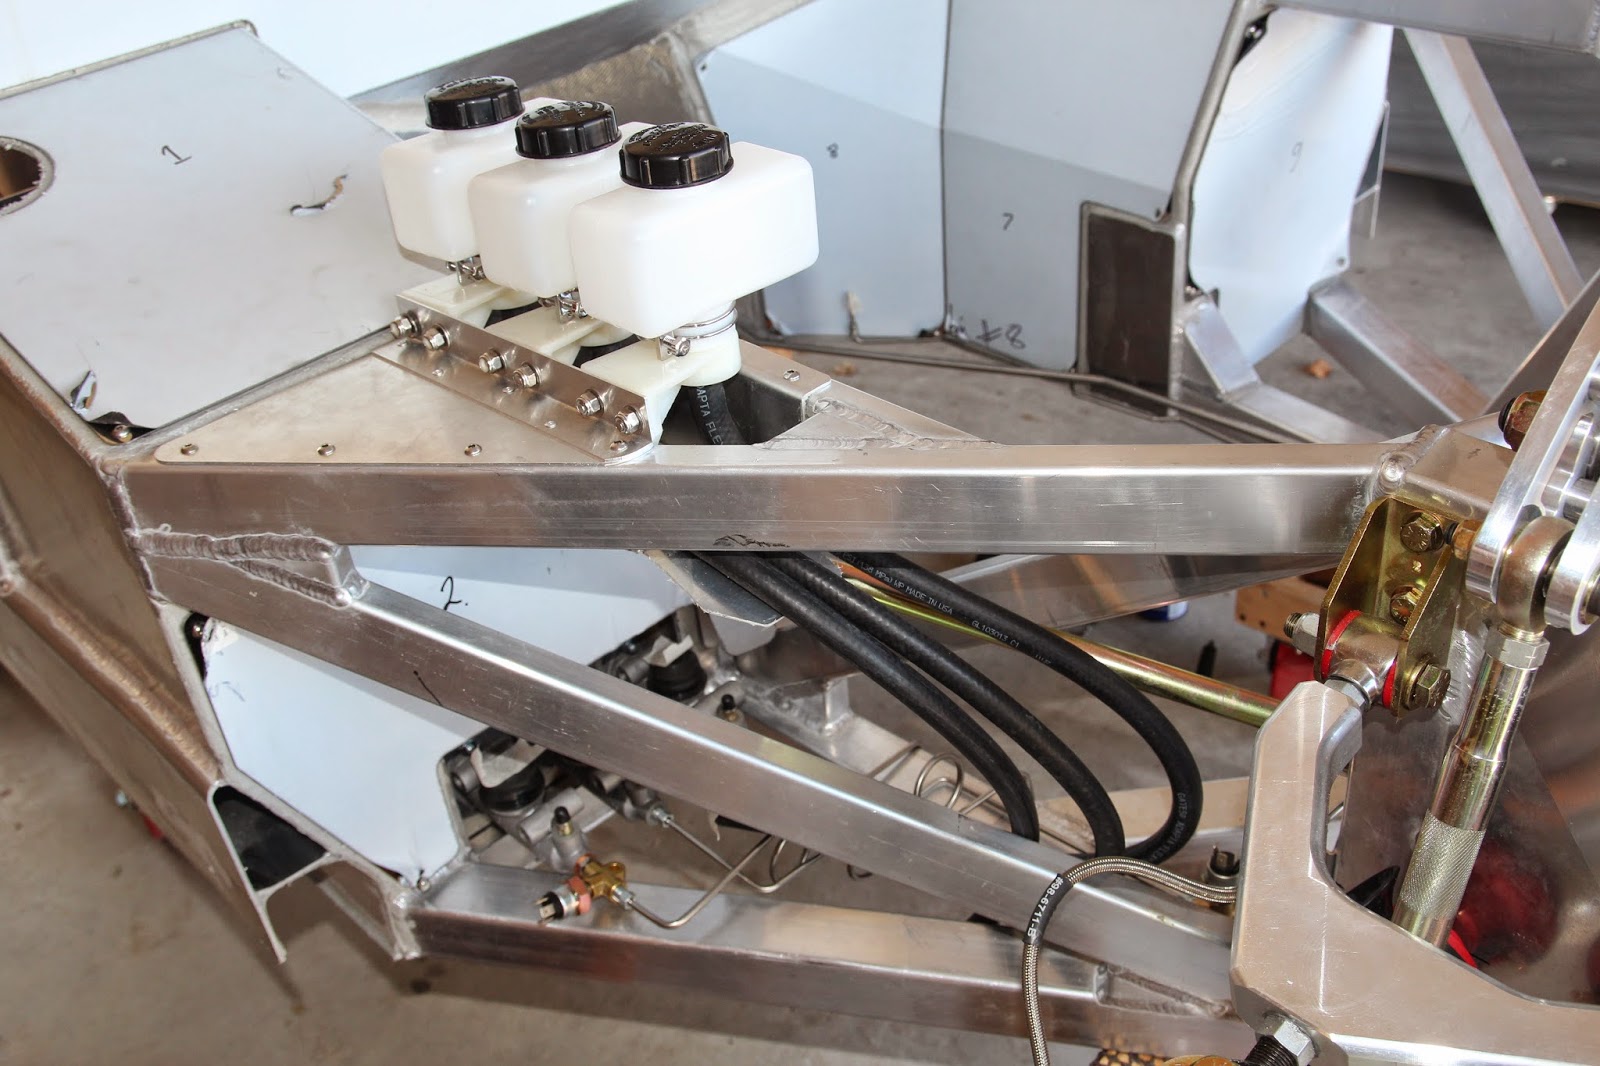
Having installed the fibre glass insulation and stainless heat shields it was time to look at the pedal box and brake and clutch line installation. I had previously made the cut out in the firewall for the master cylinder/pedal box assembly and to get the location of the pedals right I had to install the seat frame and sliders for a trial fit to my 5'9" frame.I had to cut slots in the front of the torsion box to slide the seat shear plates into position. I also found that I had to modify them to sit in position without interference in the box itself. The manufacturer has corrected the slots and shear plates on the latter chassis which will make it a lot easier for those down the track.


I set the seat so that it was 1/2 the way forward giving plenty of room to slide back for taller drivers and forward for those a little shorter such as my lady friend or daughters...I am now getting a very bad feeling all of a sudden.It's funny the things that go through your mind, I thought, well, I am going to drill the holes which consist of the mounting holes through the torsion box welded to the floor then the 1" holes through the floor it self to get a drive socket through to tighten on to the runners. My mind immediately went to ..what happens if I get this wrong, all those 1" holes (4) will not be easy to fix. Anyway I went ahead and drilled the holes and it worked a treat.

With the pedal box resting on the floor I did a trial fit but only resting my feet on the pedals lightly as they were not bolted down which felt sort of strange sitting relatively straight legged when I am used to driving a medium sized SUV.I set the pedal where I reckon they should go and marked and drilled the first hole, put a bolt in and spotted the remaining 3 holes and bolted the assembly to the floor.

Once everything was bolted together I set the seats in the right position and height and I think I am sitting a little low but I have adjustment to lower the steering column or raise the seat frames.I am currently waiting for an upgraded seal plate from the pedal box and fire wall to be able to complete the unit.

The brake lines were the next task. This was relatively easy as they are all pre-bent hardened stainless steel that only needed a small amount of tweeking to get them in position, this was the same for the clutch line as well, a very neat fit held together with stainless P-Clamps and stainless button head screws into the chassis.
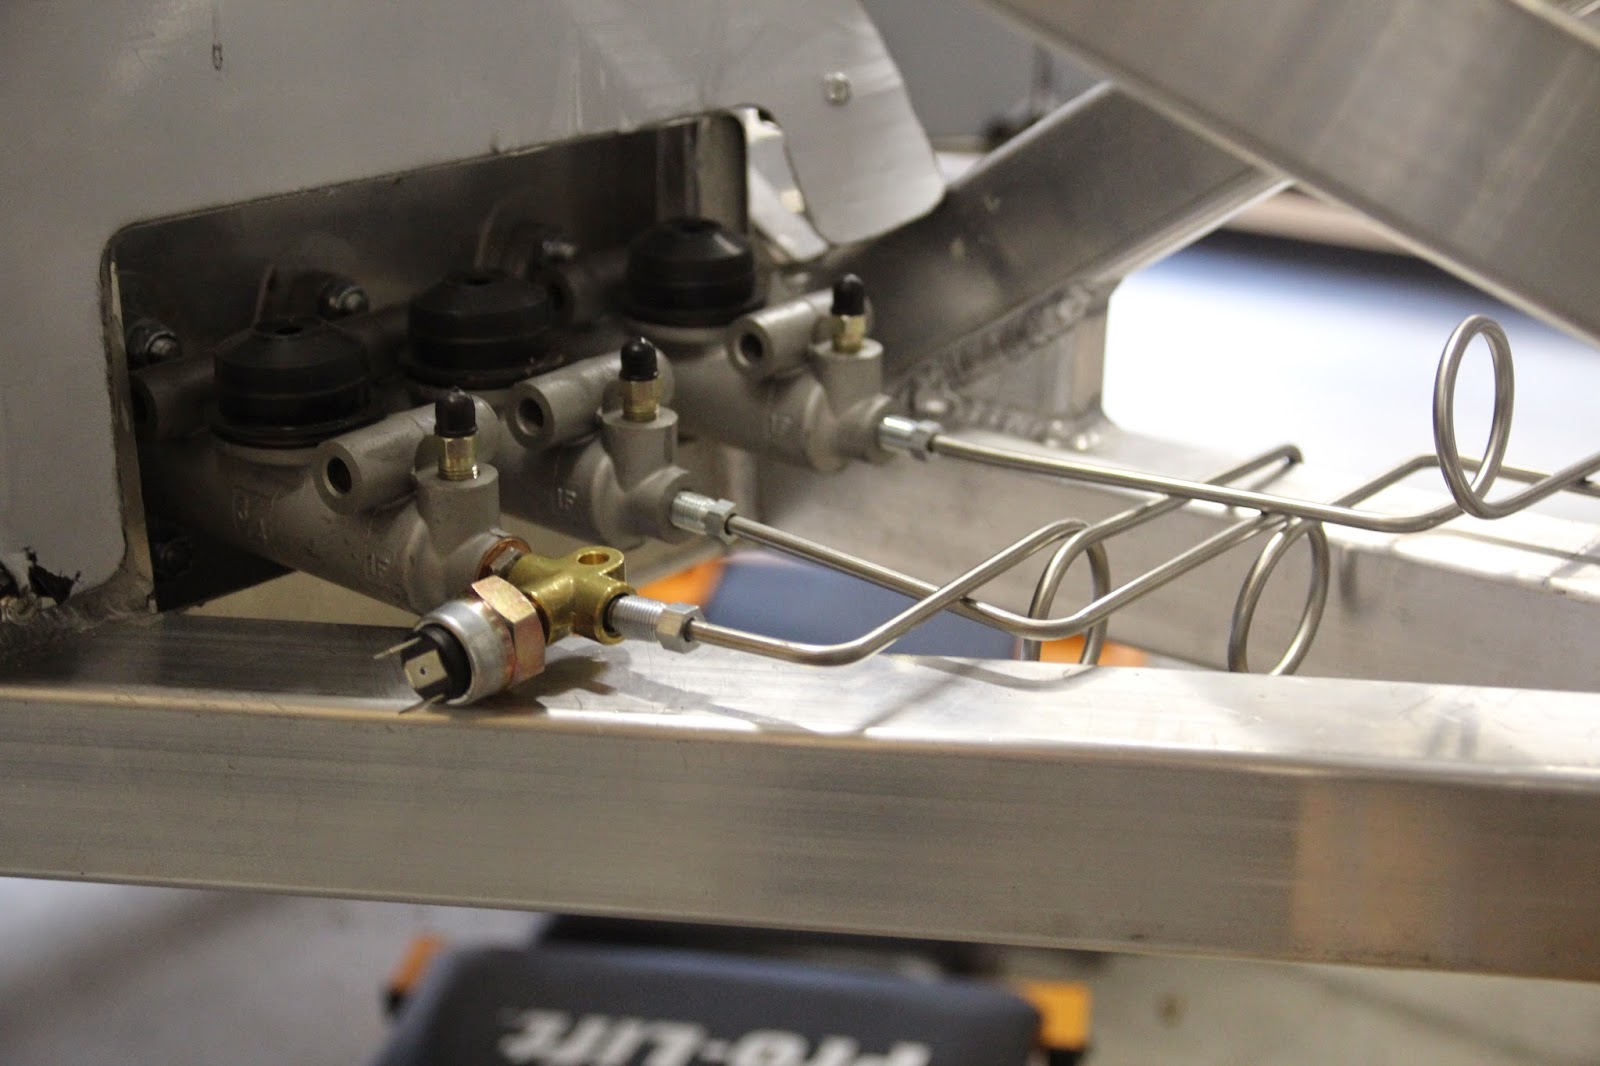


I had previously fitted the Charcoal canister and inner panels under the front L/H suspension and run the fuel vapour lines through the trans tunnel to the rear along with the brake lines.
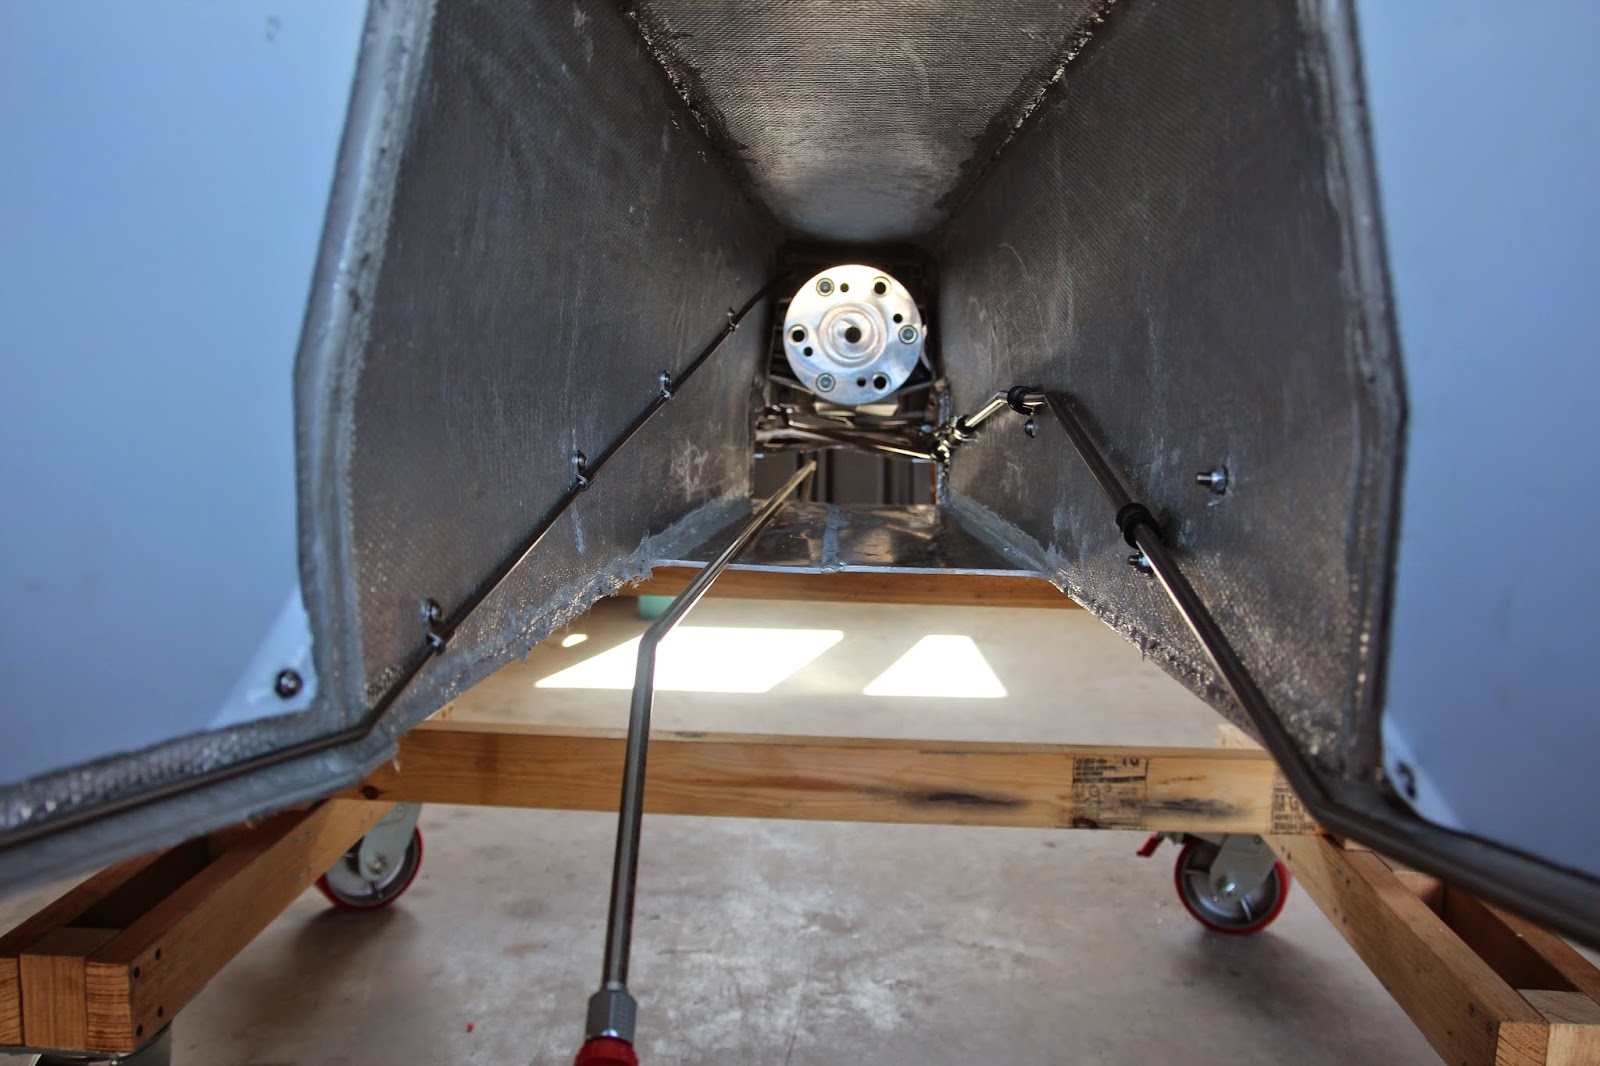
The hand brake was also relatively easy to install. I had to cut holes in the torsion box to run the cables through but a 20mm hole saw fixed all that.

I have now also fitted the pin drives and spinners and did a trial fit of the wheels to see what it looks liked, pretty good I think.

Well, that's all for tonight and I have much more to come. Getting around to doing these updates has to find me in the right mood as I find it quite laborious.

Until next time,

Cheers

Russell


Wednesday, 21 January 2015

Assembly Continues

Since my last post there has been a bit of activity to keep moving forward. Before I could continue I had to get the fibre glass insulation installed through out the fire wall, foot boxes, trans tunnel and the exhaust channels down the side of the chassis which is used to hide an under car exhaust. The insulation comes in a roll with the glass exposed on the "down side" with a heat reflective aluminium coating on the outside. The insulation is pre-marked to make cutting out easier. The dining room table seemed to be the ideal place for this job and it's a good idea to use good quality sharp dress making sissors as this stuff frays like crazy.

Once I had all the cutting out done I then numbered each part for identification purposes so they wouldn't get mixed up. I cut about 8mm inside the line to give plenty of area to seal the glass fibres. Next I used Selleys Silicone 401 Industrial Grade Adhesive and spread a reasonable thin film over the insulation prior to fitting to the chassis. The reason for using the Selleys product is that it is a strong adhesive that can be used on most surfaces and can withstand high temperatures up to 205c continuously. Another good thing about this product is that you have a bit of time to make adjustments or reposition if required.
.

Once the silicone adhesive has dried, I went over all the edges with Parfix Roof, Gutter and Concrete Silicone Sealant to stop any fraying of the insulation. The Parfix remains highly flexible and will also withstand heat up to 160c.

Once the fibreglass insulation is fitted, pre-cut polished stainless steel heat shields are screwed in place to cover the insulation. Holes are drilled and tapped through the insulation and into the chassis and stainless screws are fitted using 4mm spacers on the screws between the heat shield and insulation to create an air gap.

Now that the fire wall is finished I can go ahead and assemble and fit the pedal box and brake lines.

Until next time,

Cheers

Russell


Tuesday, 30 December 2014

Moving Right Along

One of the things that this build has taught me is patience, no not true, I have learned that over my almost 65 years but this time I find that I do not get flustered if things do not work out as I expect. Previous cars that I have built I find that I would get impatient and take short cuts that ended in disaster but this time it's slow and easy and quality all the way. I would like to think that this is a training ground for things to come like a GT40, my ultimate car.

Anyway, back to the Cobra build...

Since getting my car back home I have been able to get into the build with gusto and have all the suspension components assembled and it looks a treat

Removing the body has made the assembly so much easier and I am not banging my head every time I try to do something. I must say that buying a mobile seat from Super Cheap has been the smart thing to do so now I rip around my workshop at high speed without shifting my butt.

Anyway, on with the build. I have assembled the front suspension and steering along with the rotors and calipers.

The beauty about this build is that I seem to be making great progress with the big items, like suspension, brake components and other items but it includes a lot of mucking around getting things to work such as the steering which really took a lot of thought.

When it came to the rear axle, it was all very strait forward apart from the omission of the crush tubes that hold the diff shear plates to the chassis rails. With a little bit of thought and some help from Pace we were able to come up with a solution that allowed the installation of these tubes so we got the job done. I finally got the rear suspension together including the axles and brakes.
Hope you are enjoying my build of a Pace427 Build No.31

Cheers

Russell

Thursday, 11 December 2014

Assembly Starts

I now have my Cobra home and sitting on the trestles I made for it.

The big issue was sorting out all the components and where they go so the logical thing to do was to reduce the amount of components into sub assemblies such as all the suspension components an put all the fasteners with the corresponding bits which made the search for parts much easier.


I decided that as the bell cranks form part of the asthetics of the engine bay, I would give them a brushed appearance. I made a jig to hold the bell cranks then taped a variety of abrasive grits to a flat marble cutting board and rubbed them to a beautiful brushed look


Once I had the sub assemblies together it was time to assemble to the chassis, this took no time at all. As the nuts are all Nyloc type, a 1/2" ratchet was a great investment cutting the time down no end.
As I started to assemble the Front suspension I came to realise that the body had to be removed from the chassis so I made a movable trolley to sit it on and this has made life so much easier.


Lifting the body of was easy, I just rounded up the guys next door and the job was done, them we had a party

I will leave it here for tonight as there is lots more to come

See you next time

Friday, 14 November 2014

Now in my possesion

Having completed our road trip to collect the Cobra from Absolute Pace and getting it settled into it's home, I was faced with the drama of working out where all the bit go.
And just when you think you have it all, more parts turn up.
When you see all the parts laid out on the bench, it becomes quite a daunting task to identify them. There are 13 compartment boxes with all sorts of nuts, bolts and different fittings and all quite clearly labelled once you can find what you are looking for..
I purchased this Cobra as a package that included everything I need so I am not running around looking for bits and pieces. Not only do you have all the parts but it is a very cost effective way of building a Cobra.
In my next post, we start the assembly of the components.
See you next time.

Cheers

Russell