First thing I did was to remove the flywheel and fit the block plate. To do this I had to relieve the central bore of the block plate to clear the crank sensor ring so it would sit flat on the block face.


Once the block plate is on the dowels and sitting flat on the face of the block, the bell housing can be fitted. In this case I am using a QuickTime RM-6081 that carries an SFI 6.1 safety rating. The bell housing can then be mounted to the engine and the bolts torqued to the correct spec. This is where disaster struck. When working with anything made from aluminium I am very cautious of the loads being put on bolts. I took the bolts supplied with the bell housing and screwed them into the holes just to be sure and they screwed in nice and firm. The specified torque for the bolts was 47Nm so I set my torque wrench at 20Nm for the initial tightening sequence. I nipped each thread to a snug torque then started to apply the load. I had only applied a light load (less than the set 20Nm) when the bolt felt very plastic which I thought was odd so I moved to another bolt and the same thing happened. That is where I should have investigated further but I tried another bolt and once again the bolt went dead. I removed a bolt and measured the diameter and pitch which was 3/8"UNC then went to the internet and googled the Coyote/QuickTime combination and their were several posts warning about this very situation, the threads in the block were in fact 10mm x 1.5 which means the 3/8" thread was 1/2mm smaller and the thread was coarser and when I tried the bolts the coarse thread took up any clearance and made it feel like all was ok and I had very effectively stripped 3 bolt holes, oh bugger, what now. The bosses in which the mounting holes were tapped into are quite a deal longer than the threads, that is, the threads were less than half the way through the boss so I got the correct tap and ran the thread all the way through and fitted much longer bolts, presto, job done.
Having got the bell housing correctly torqued up I set a dial indicator and clocked up the bore of the housing as this has to be with in a total run out error of .010" or .005" of the centre line of crank and gearbox shaft.

I found with my bell housing that it had a significant error of .014 total indicator run out but a bit jiggling around and I was able to repeat the reading that were with in the allowed error so I decided that I had it right.
Next step was to fit the clutch which wasn't a big deal. I has purchased a clutch pin kit for this 11" Ram Performance clutch so I had to remove the flywheel again and press the standard pins out and fit the stepped pins from the pin kit.

The next step was to fit the bell housing to the gear box. The QuickTime bell housing comes with a close tolerance centering ring to align the box to the bell housing and having fitted the ring it is just a matter of bolting the gear box and bell housing together.

As there is no room in the tranny tunnel to run a clutch throw out fork and slave cylinder, it is necessary to run a hydraulic throw out bearing instead. Having done some previous research, all roads pointed to Mal Wood Automotive in QLD who just happens to make a much improved unit. I contacted Mal and ordered the bearing and Mal also made the mods to the TKO bearing adaptor for me. This is a great unit and very easy to fit, it is just a matter of removing a mounting bolt and replacing it with a pin supplied to stop the bearing from turning. To set the distance for the bearing to pressure plate fingers, a series of conical spacers are provided and is only a matter of following Mals instructions for measurements and the jobs done.


One thing I had to do was to get a right angle fitting for the feed line so it would easily clear the opening in the bell housing. I could have got away with this but I thought for the sake of $25 I won't have to worry about the line rubbing on the bell housing opening. I then fitted the trans to the engine and it just fell together which is always good.


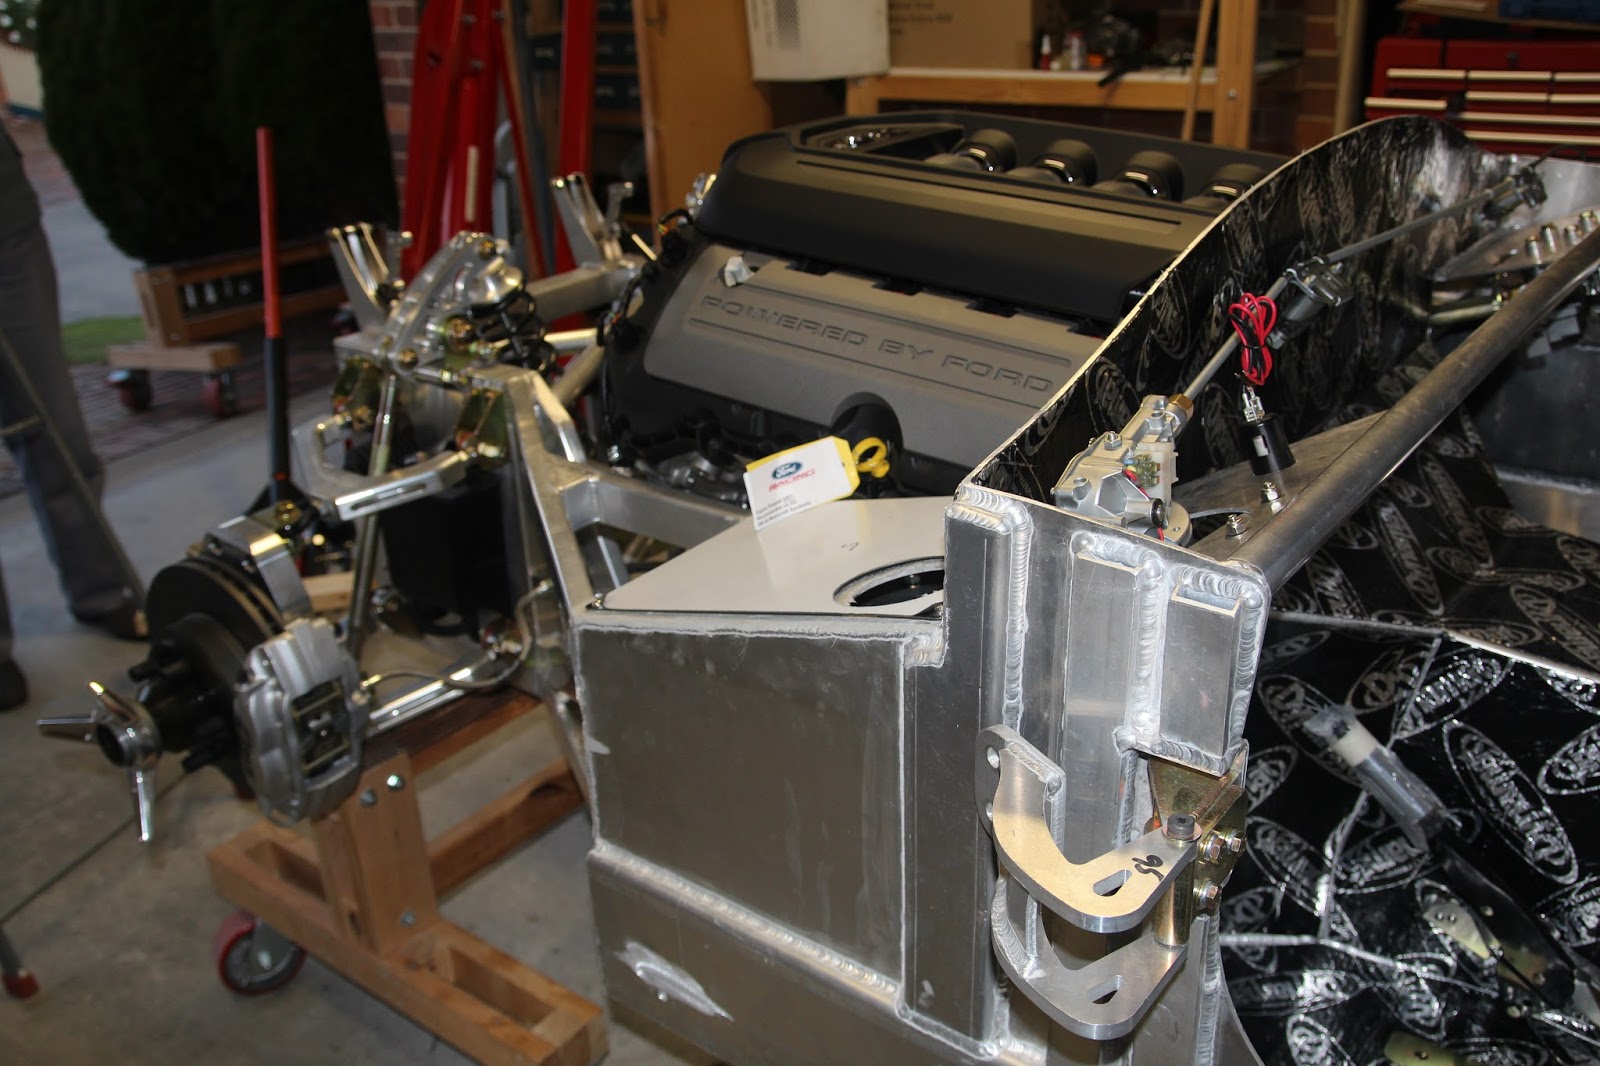
The time has come to fit the engine to the chassis which is an exciting time as so much time is spent getting ready for this moment. As Murphys law would have it, not all went to plan. Firstly, this is one heck of a big engine dimensionally with very little clearance in the engine compartment and is quit difficult to line everything up at the same time. I mounted the engine mounts to the chassis and the corresponding mounts to the engine then proceeded to lift the engine and trans into place. Without going into 4 hours of pushing and shoving and trying everything possible, this %$#@#*&#$ thing simply will not fit. We could not get the engine back far enough to align with the mounts. One of the critical issues is the engine has to be correctly aligned on the hoist and not tilted one side to the other as it is so wide that a small error creates a major problem trying to get it in the engine bay. We pulled the mounts of the chassis and dropped the engine as low as it would go with the view of coming up under the mounts and that is when we realised that the mounts would not fit regardless so we removed the engine and started taking measurements (which we should have done at the start). Their was a 38mm discrepancy between the block mounts and the chassis mounts so that ended our day. On Sunday morning I emailed Pace about the problem and about 10 minutes later I got a response from Craig, the owner of Pace saying he would have a look at the problem on the next day. Around midday I got an email from Pace saying they had built new mounts and they were on their way to me, I received them Friday afternoon, what great service from Absolute Pace. You can see the difference in the pic


On Saturday morning I was going to have another go at fitting the engine but it was so cold in Geelong I decided that their are other things that need doing, only in the warm of the house. On Sunday my friend Deb said "lets go fit that engine" so we did. Beautiful sunny day, very cold but had the potential to warm to at least 8 degrees. On the previous day I had fitted the mounts and measured them and balanced the engine so it should be an easy fit. We dropped the engine into the chassis and started to jiggle and jack it around and that's when Noel, my neighbor came in and with the extra hand we worked out that the chassis mounts need to come off and we fitted them to the block mount and we were able to get the engine bolted in position.


The transmission mount has been bolted into position but I think the engine will have to come out again as the QuickTime bell housing (starter motor area)is contacting the drivers foot box so I reckon that if I grind 5mm of the bell housing all should be sweet.
Well stayed tuned for the next episode in my adventures and please contact me if you want more information.
Cheers
Russell